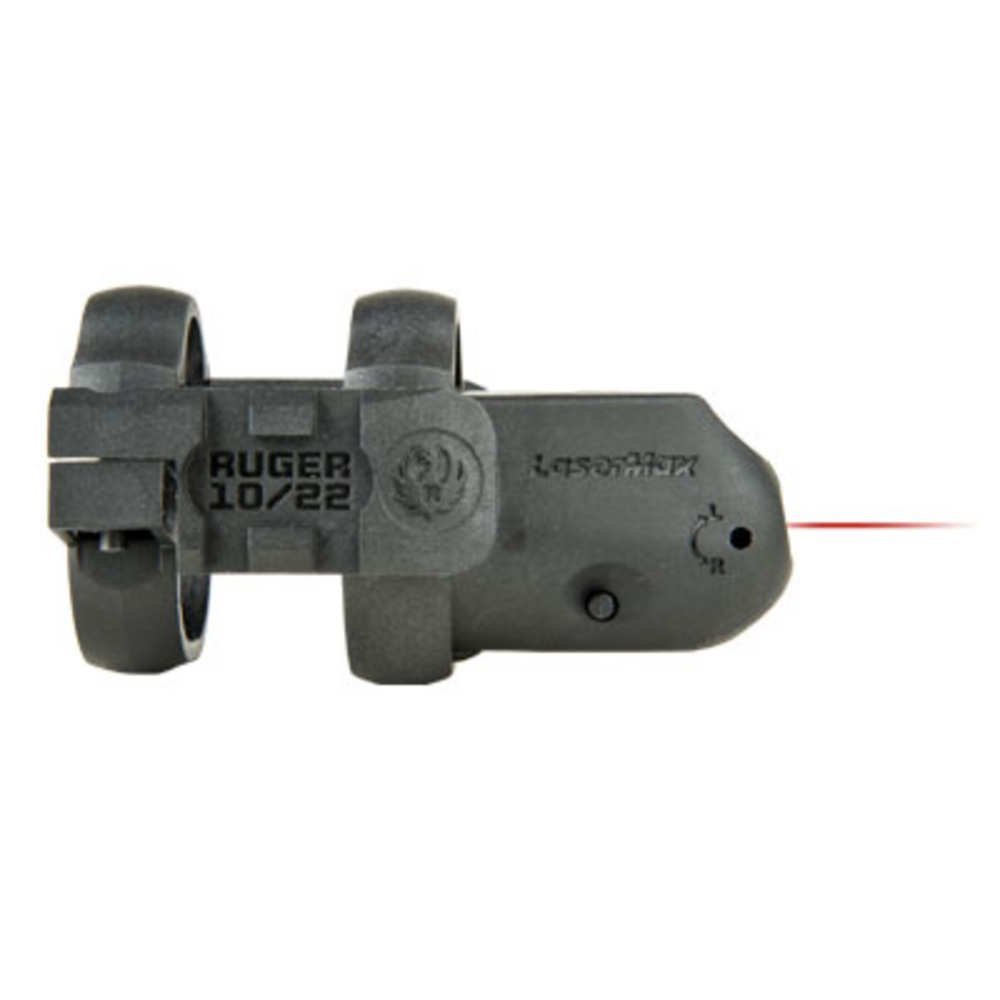
In this short article well be discussing the LaserMax for the Ruger 10/22. I’ll go into depth about the details of purchase, installation process, productivity, first impressions and overall review.
LaserMax: What, Why, Where, When, and How?
What?
When you first open the package, you’ll find inside the Lasermax along with an allen and a couple of screws along with it. You’ll notice the battery is in there enclosed. If you’re new to dressing up your rifle, don’t stress… the package comes with instructions that tell you what goes where.
Why?
Ruger 10/22 Laser Sights are specifically for precision aiming. They are made by LaserMax and designed to work with your Ruger 10/22. The bright red 635nm continuous-wave laser is easily visible all the way out to 100 yds. The Laser Sight is pre-aligned at 25 yds., but is very easily adjusted for windage and elevation.
You’ll notice the picatinny rails on this sight are awesome for adding additional accessories like a tactical light or infrared laser. This is built to be a great accessory too, thanks to its rugged yet lightweight Fiberglass Reinforced Nylon construction.
Where?
I purchased the Lasermax from Ruger itself but I happen to see that it was cheaper in a local sporting goods store. Ruger sells it for $129, but if you want to buy it off of Amazon, you can find it for a variety of different prices. I decided to stick with buying from Ruger just to be safe but if you want to save time and money you could definitely buy from a different source.
When?
So, I’ve owned this accessory for over a year now and I can say I’m overall very happy with its productivity. So far mine has stayed on sight. Once sighted in I have taken the gun on several trips where, in its takedown case, was literally thrown into the trunk of my car. It has stayed on zero through this punishment and many rounds of ammo.
How?
As I already mentioned, this accessory does come with instructions, but to sum those instructions up in a nut shell, here’s what to do. First thing you need to do its unscrew the barrel band in order to remove it (the laser will go in its place). If you take a look, you’ll notice that the laser is shaped like a barrel band in order to replace it. If you find a tab in the battery, make sure to remove that.
After removing everything that needs to be taken off, you carefully fish on the laser to the gun while rotating it until it clears the sight, and then place it onto the guns stock in place of where the barrel band was. Tighten the screw you’ll see on top to secure it, and then place the battery cover where its needed and attach it with the 2 Phillips head screws that it comes with. The batteries that it needs are two 13N batteries.
Overall Review and Impressions
When I first saw this product, I only bought it because I thought it would be a cool toy to play with, but it turns out that it has some real practical advantages too.
However, you should be aware that too much force while installing could strip the screw and make it impossible to replace the cover. The very small hex wrenches for laser adjustment are, well… very small. But once adjusted I have had little need for readjustment. All that said, I have not encountered any major flaws for my particular 10/22. I would have, however, liked to have seen a provision for a sling mount, or possibly a third rail along the bottom to mount a sling or tripod with.
I give the LaserMax 4 out of 5 because of the lack of sling mount, and the possibility of someday stripping the plastic with the cove screw. But that being said, I would most certainly recommend this accessory for the 10/22. I’m very impressed!


No comments yet.